28
Apr
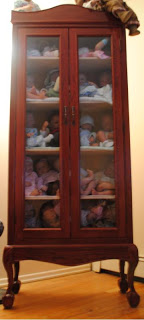
 The idea for this project came from one of my wife’s hobbies. She collects life-like dolls and not only that she loves to make them. We simply needed a better place for her to store them because she has quite a few. About the same time I was kicking the idea around for this display case we were also making a set of upper cabinets that got screwed up somehow and the dadoes didn’t line up right. We didn’t figure this out till the case was glued up. What can you do…mistakes happen right.
At this point we
had two decent sized cases that were basically considered junk and were going to wind up getting chopped up or tossed. They sat outside the Wall Woodworks shop for a good couple of months. They got rained on and were getting water damaged.
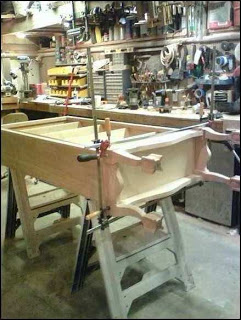
I let them dry out a bit and started making the display case face frame material, putting in some shelves. Basically I needed to get to the point to where the upper case was done so I could get the measurement to start fabricating the legs and the rails. Once I got those measurements I could figure out the rabbit i needed to make to rest the upper case in. In the upper picture I had milled the rabbit in all 8 pieces, cut all the mortise and tenons, made the carved cock-bead around the base( but not on the legs yet), and carved the balls in all four legs. At this point I could dry fit everything together.
Now I could get to work on carving the claws and shaping the legs, along with that I could start carving in the beading that detailed legs. While I was going through this process i was almost tempted to do some relief carving on the base as well but the wife was getting anxious and decided to scrap that idea.
After many hours of carving, sanding scraping and fine tuning all of the beading and claws I was finally was ready to glue up the base to the main carcass after that all that was left to do was mill up the upper sections and get those fastened.
While all the glue was drying I needed to start on the door frames. Which was pretty simple, 8 pieces of stock with mortise and tenon joinery.
While all the glue was drying I needed to start on the door frames. Which was pretty simple, 8 pieces of stock with mortise and tenon joinery.
Then I needed some custom beaded and rabbited parts for the door frame too keep the glass secure on the outside of the doors. A simple rounded over bead for the backs of the glass. Then I needed some bead and cove moulding for the areas were the base met the carcass and where the carcass met the decorative top. Once all of the was installed and final sanding. I used Sedona Red oil based stain and High Gloss Polyurethane.


